Every operator runs equipment that doesn't show up in a default catalog. Specialty rod grades, custom alloy strings, regional pumping units. PetroBench's equipment library lets you define those items once and reuse them across every simulation.
Open the equipment library
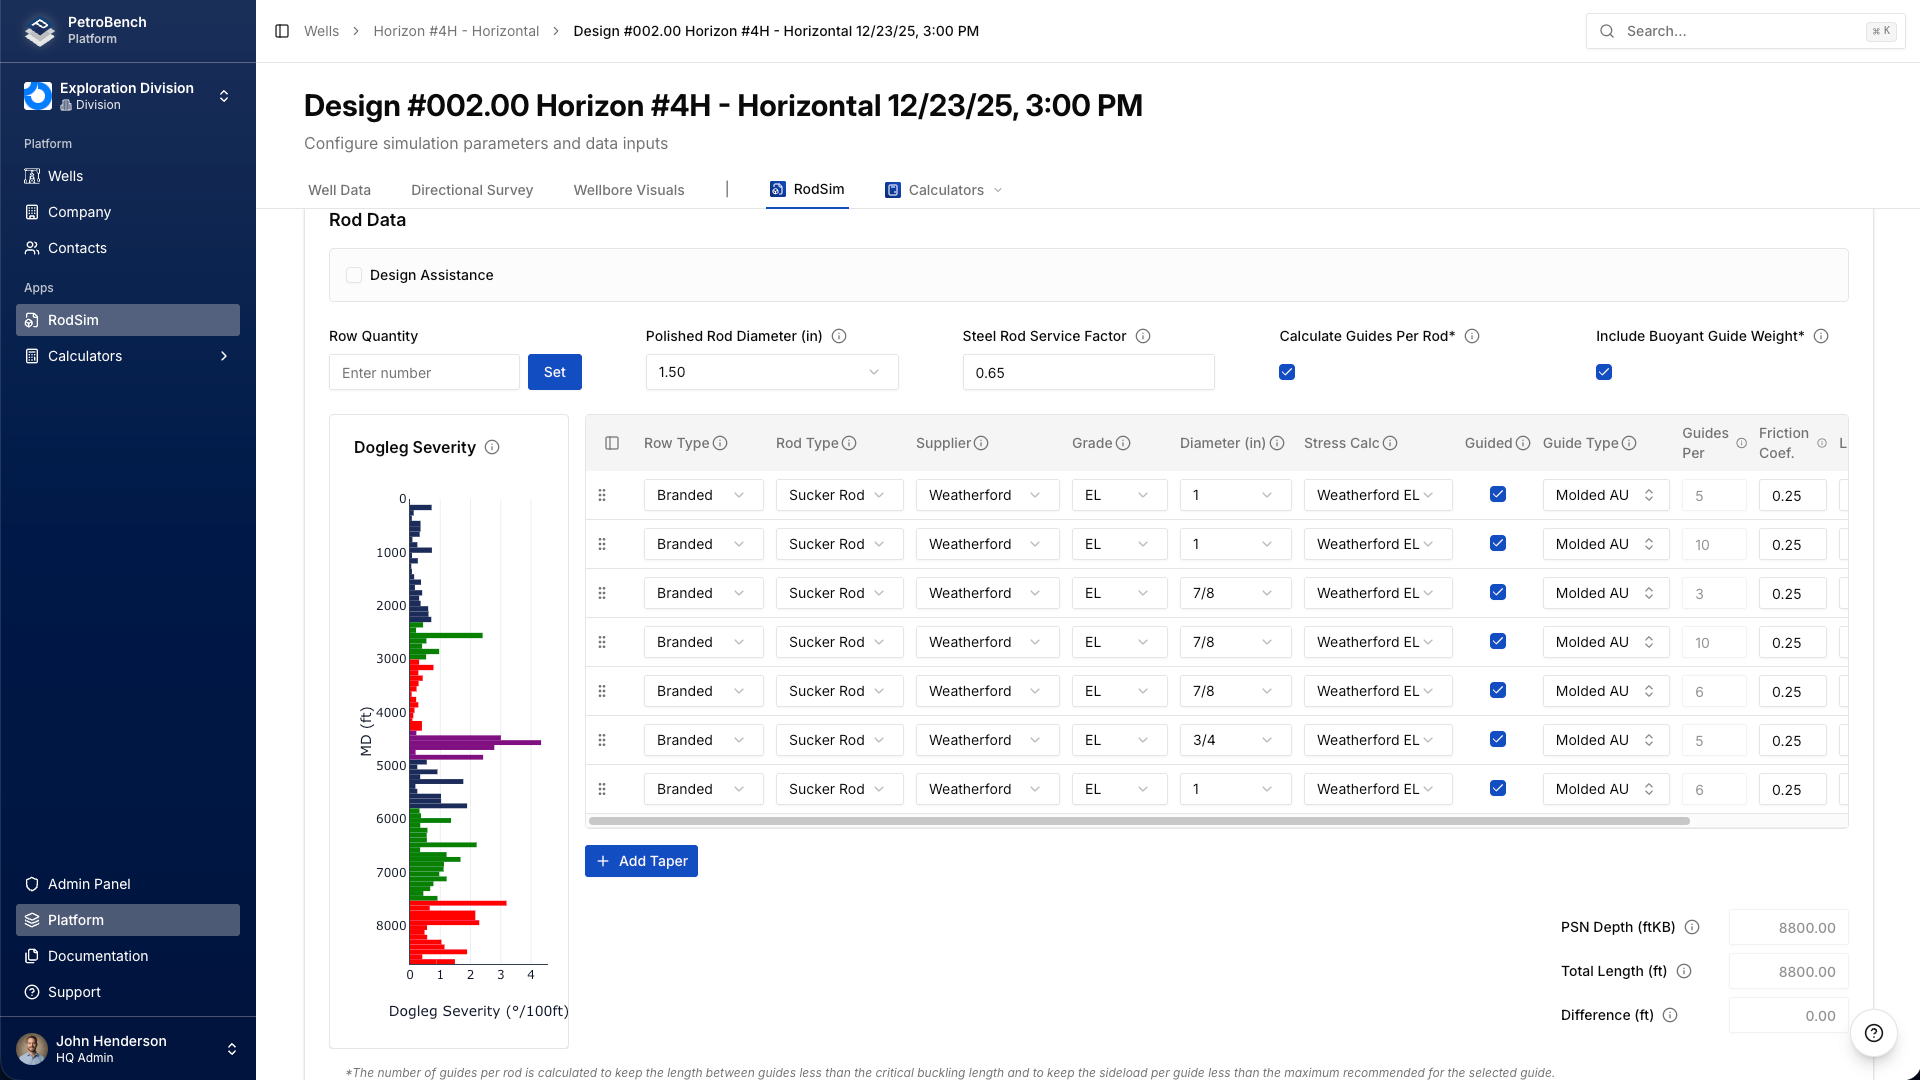
Navigate to any RodSim design and click the Rod Data tab. At the top of the rod string table, click the equipment library icon to open the modal.
The library opens with two top-level tabs: Pumping Units and Rods. Select Rods to manage rod grades.
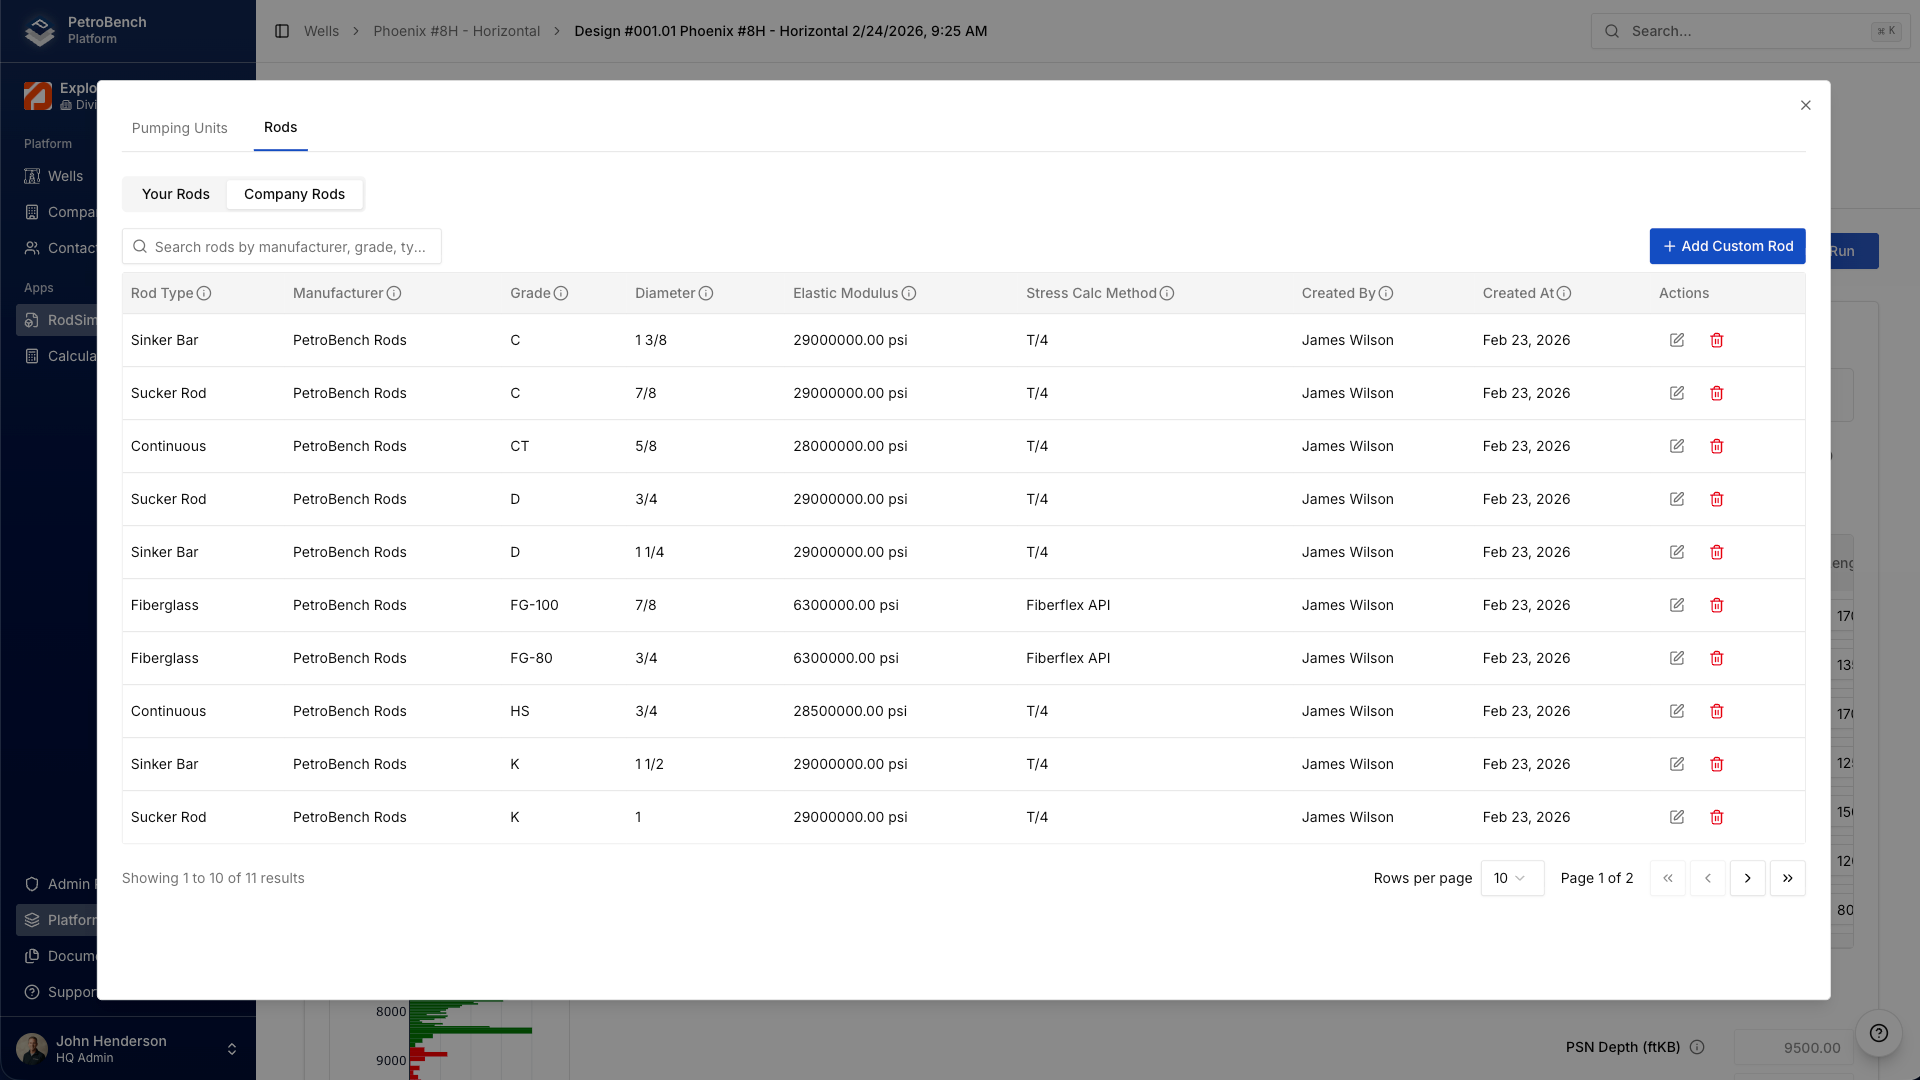
Your Rods vs. Company Rods
Inside the Rods tab you'll see two sub-tabs:
- Your Rods: entries you created. Only you can edit or delete these. They're available in every design you open.
- Company Rods: entries shared by your organization's admin. Read-only for most users, but available to everyone on the account.
Use the search bar to filter by manufacturer, grade, or type. The table updates in real time as you type.
Add a custom rod grade
Click + Add Custom Rod in the top-right corner of the Rods tab. Fill in the following fields:
- Rod Type: select from standard types (Sinker Bar, Sucker Rod, Continuous, Fiberglass, etc.)
- Manufacturer: the rod manufacturer name (e.g., Weatherford, Tenaris, or your custom supplier)
- Grade: the material grade designation (C, D, K, KD, HS, or any custom grade code)
- Diameter: rod body diameter in inches (standard sizes: 5/8, 3/4, 7/8, 1, 1-1/8)
- Elastic Modulus: Young's modulus in psi (steel rods are typically 28,500,000-30,000,000 psi; fiberglass is lower)
- Yield Strength: minimum yield strength in psi. This value directly affects the stress calculations and safety factors in your simulations.
Click Save. The new entry appears immediately in your rod library and is ready to use in any design.
Use custom rods in your design
Back in the Rod Data tab, your custom grades now appear in the Supplier and Grade dropdowns for each taper in the rod string. Select the manufacturer and grade you just created, and PetroBench automatically applies the correct elastic modulus and yield strength to the simulation.
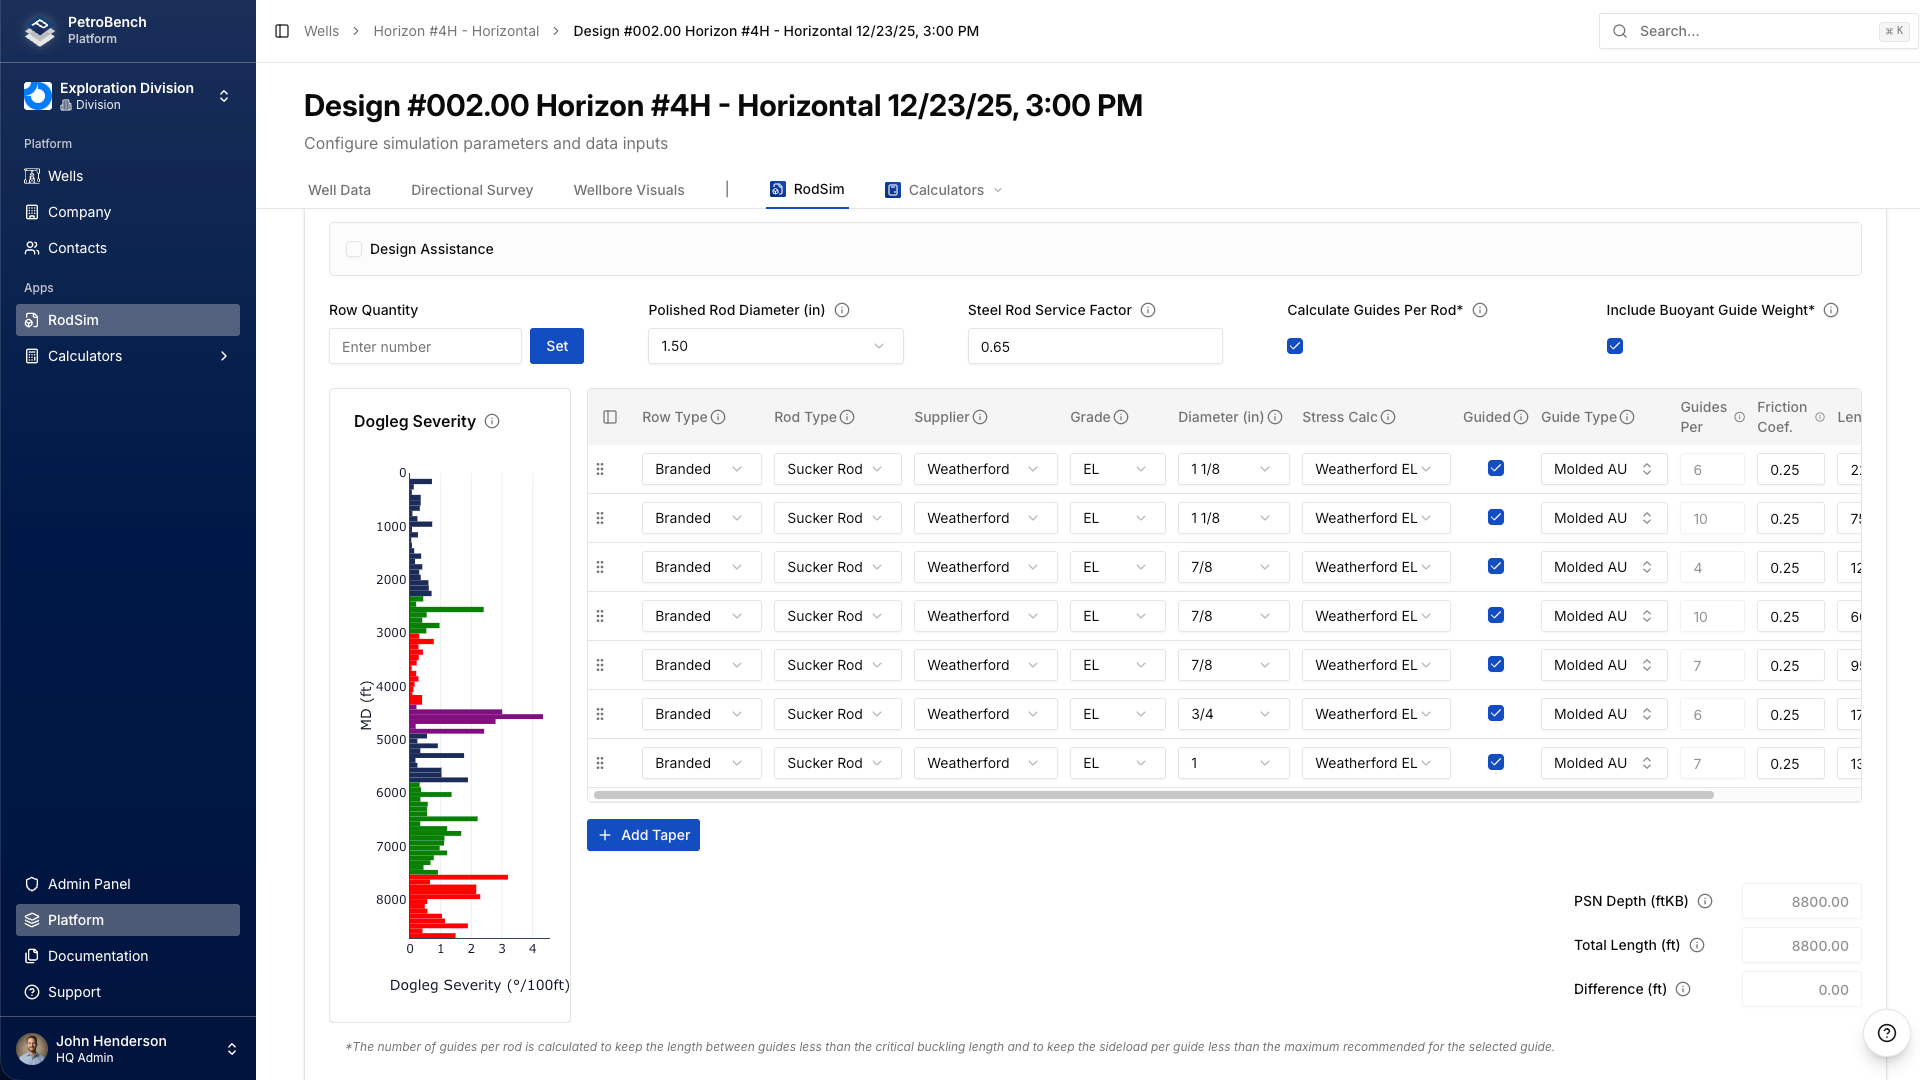
The Design Assistance view on the left shows the dosing severity chart and updates in real time as you change rod grades. Use this to compare how different grades affect stress distribution across your tapers.
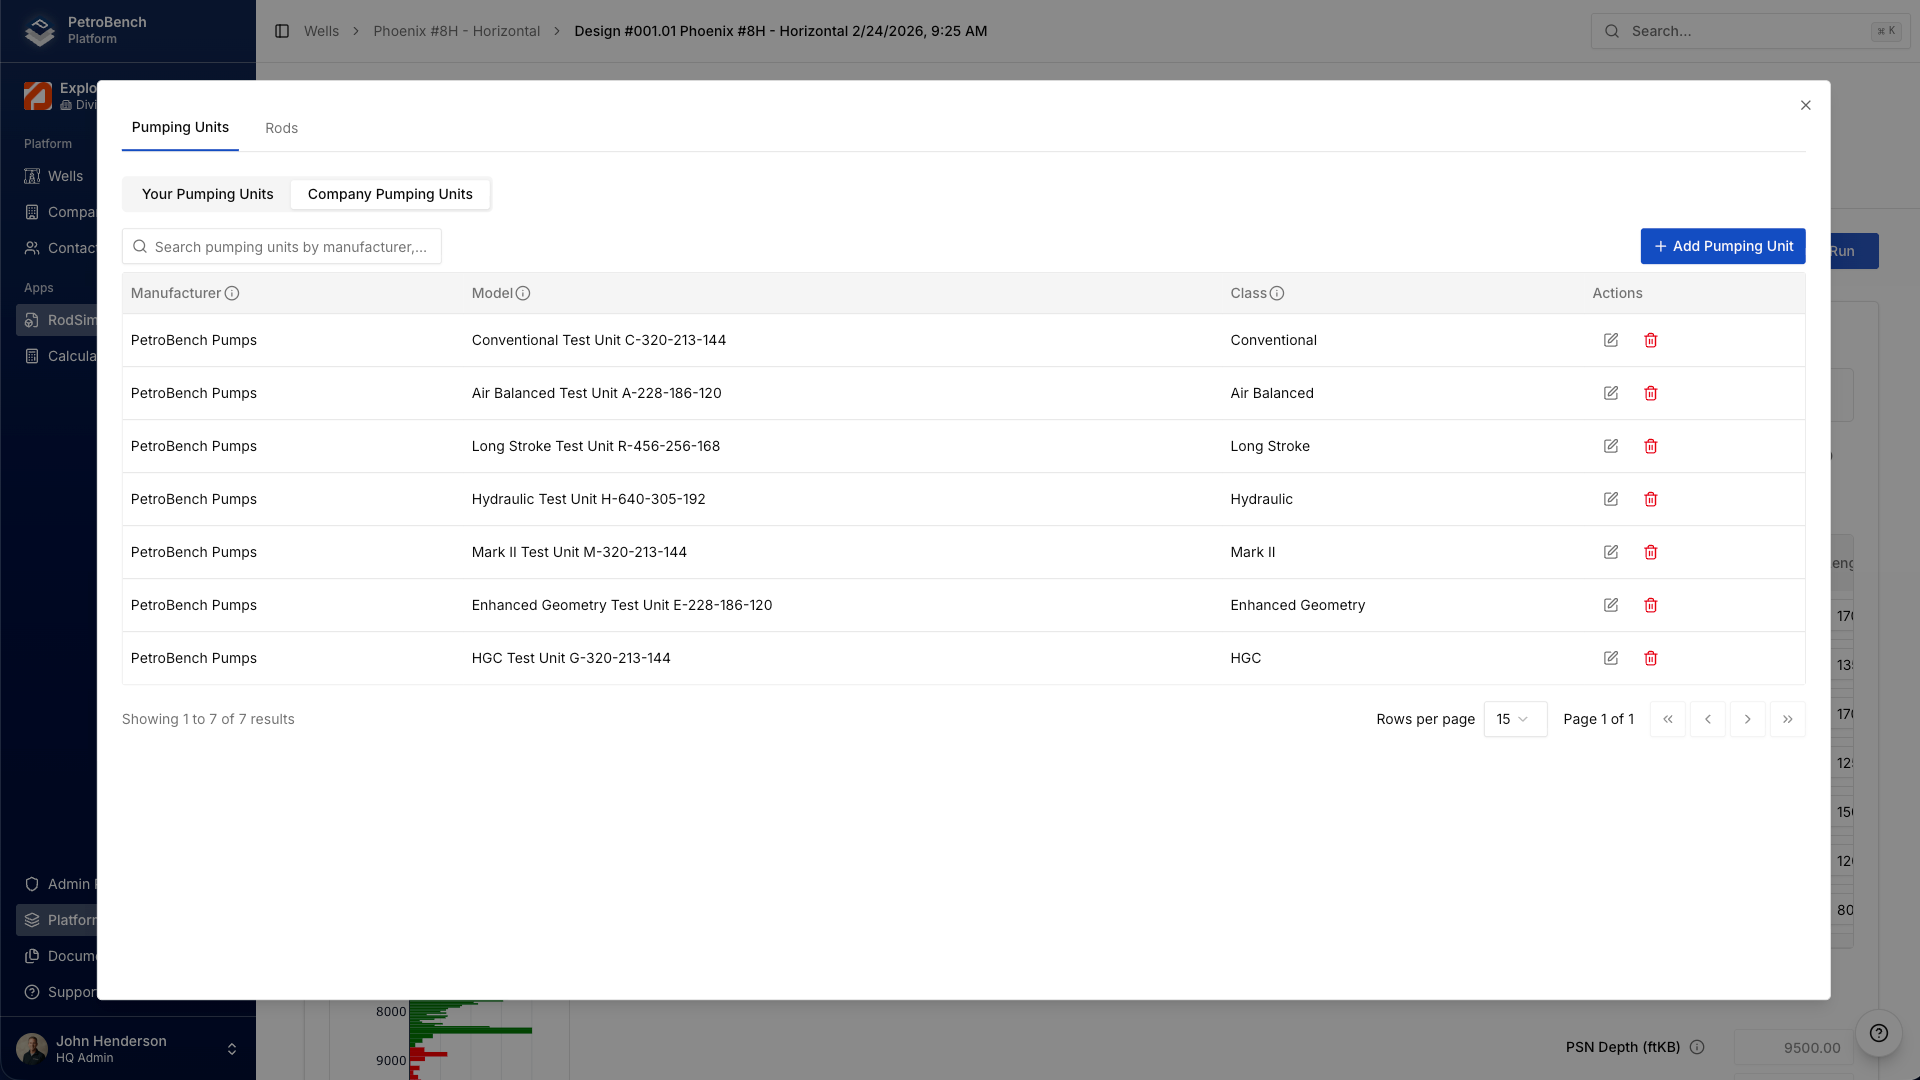
Pumping units: same pattern
The equipment library also covers pumping units. Click the Pumping Units tab at the top of the modal to access it. The workflow is identical:
- Browse Your Pumping Units or Company Pumping Units
- Click + Add Pumping Unit and enter the manufacturer, model, and class (Conventional, Air Balanced, Long Stroke, Hydraulic, Mark II, Enhanced Geometry, HGC)
- Save, then select the unit in your design's pumping unit configuration
Share custom equipment across your organization
Organization admins can promote personal equipment entries to the Company tab. Once promoted, every user on the account sees the entry in their Company Rods or Company Pumping Units tab. This is the cleanest way to standardize equipment data across your engineering team.
If you're not an admin, create the entry under Your Rods and ask your admin to promote it. The entry stays available in your personal library either way.
Best practices for naming custom entries
Consistent naming keeps the library useful as it grows. A few guidelines:
- Use the manufacturer's official name. "Weatherford" not "WF" or "Wford." This makes search predictable.
- Match the grade to the spec sheet. If the manufacturer calls it "KD-75," use "KD-75" - not "KD75" or "K-D 75."
- Include all diameters you use. Create one entry per rod type, grade, and diameter combination. This gives you precise control in the rod string configuration.
- Double-check material properties. Elastic modulus and yield strength drive the simulation's stress and fatigue calculations. Verify these values against the manufacturer's data sheet before saving.
- Coordinate with your admin. Before creating entries that the whole team will use, agree on naming conventions. It's much easier to get it right once than to clean up duplicates later.
Wrap-up
The equipment library is the single source of truth for every piece of hardware in your rod lift simulations. Define it once, use it everywhere, and share it with your team. Custom entries carry the exact material properties your designs need - no more manual overrides on every new simulation.